


Sidenote
This month on Hashnode we have been running the #DebuggingFeb Writeathon. As a software developer at Hashnode, I thought I'd join in. Of course, I won't be eligible for any prizes of course but it's a great opportunity to share knowledge with the wider developer community here on Hashnode and beyond.
Introduction
Did you know it is possible to make persistent-through-reload CSS style changes using the in-browser dev tools? This method can also be used for other needs as well as what I'm going to show, so it's a really useful tool to have in your debugging arsenal.
Recently I came across a UI bug that was only visible in our staging environment, and not in my localhost environment. Persisting style changes this way was something I needed to help solve the bug efficiently and cleanly. It's not something you'll likely need very often but is an awesome tool to have in your debugging arsenal.
TLDR
Make style changes persist through a reload using the in-browser dev tools.
Open Chrome dev tools
Visit Sources tab -> Overrides sub-tab -> Select folder for overrides -> Click Allow -> Select Enable Local Overrides -> Use Sources/Page tab to select files -> Right click Save for Overrides -> Make your style changes
User the Sources tab for style changes if the source of the styles (CSS) is coming from an HTML file.
Profit!
What bug was I facing?
The bug itself was not so interesting, I'll be honest. But the conditions around the bug made it a more challenging fix to solve efficiently.
We often make use of staging environments as a midpoint between local development and production. This is currently the case for our Hashnode-powered blogs. I'm sure you've noticed some significant changes to your blog recently after we released a multitude of awesome UI and UX enhancements. We have seen a lot of positive feedback for these changes which is awesome to hear.
While the team and I were testing some of these updates in staging, it was reported to me that there was a layout shift during a page load for our new navbar which I was responsible for.
If you look closely, you'll notice the size of the top navbar changes once the newsletter and dashboard links come into view. Layout shifts can be super jarring in many situations and should be avoided where possible.
Although the bug itself would likely be adding/removing a style or two, knowing exactly which style needed to be added or removed was problematic without visualisation of any changes. I couldn't see this in my localhost development.
Our staging environment is pretty fast these days, much closer to production than the development environment which helps us catch issues like this before we ship them. I set out to investigate and since I couldn't replicate using localhost, I would have to debug the issue using the staging environment.
The problem was that I didn't want to push changes to the staging branch that I thought might fix the problem, I wanted to know that it was sure to fix the problem. Better to avoid pushing commits and possibly having to revert them, or end up with a cluttered history of commits with descriptions like this:
fix: pls fix layout shift for main nav 🙃
Solution: Using the Chrome browser dev tools
Like many of you, I often use the in-browser dev tools as an efficient method of trying out different style changes at speed. It's a great way of making a multitude of quick changes without touching the codebase. If you don't use it often, give it a go.
Any changes you make to styles this way will disappear when you reload the page. That's a problem when you need those style changes to persist after the reload. I needed to see that the change I would make was fixing the layout shift. That's where the Chrome browser dev tools came to my rescue.
Chrome Dev Tools 'Sources' Tab
We can preserve style changes through reload using the Sources tab of the Chrome Dev tools. This feature was released a few years back but having just come across this myself, some of you might also be seeing it for the first time.
I'll be using the Chrome dev tools for this tutorial.
Open up the dev tools through a right click -> Inspect
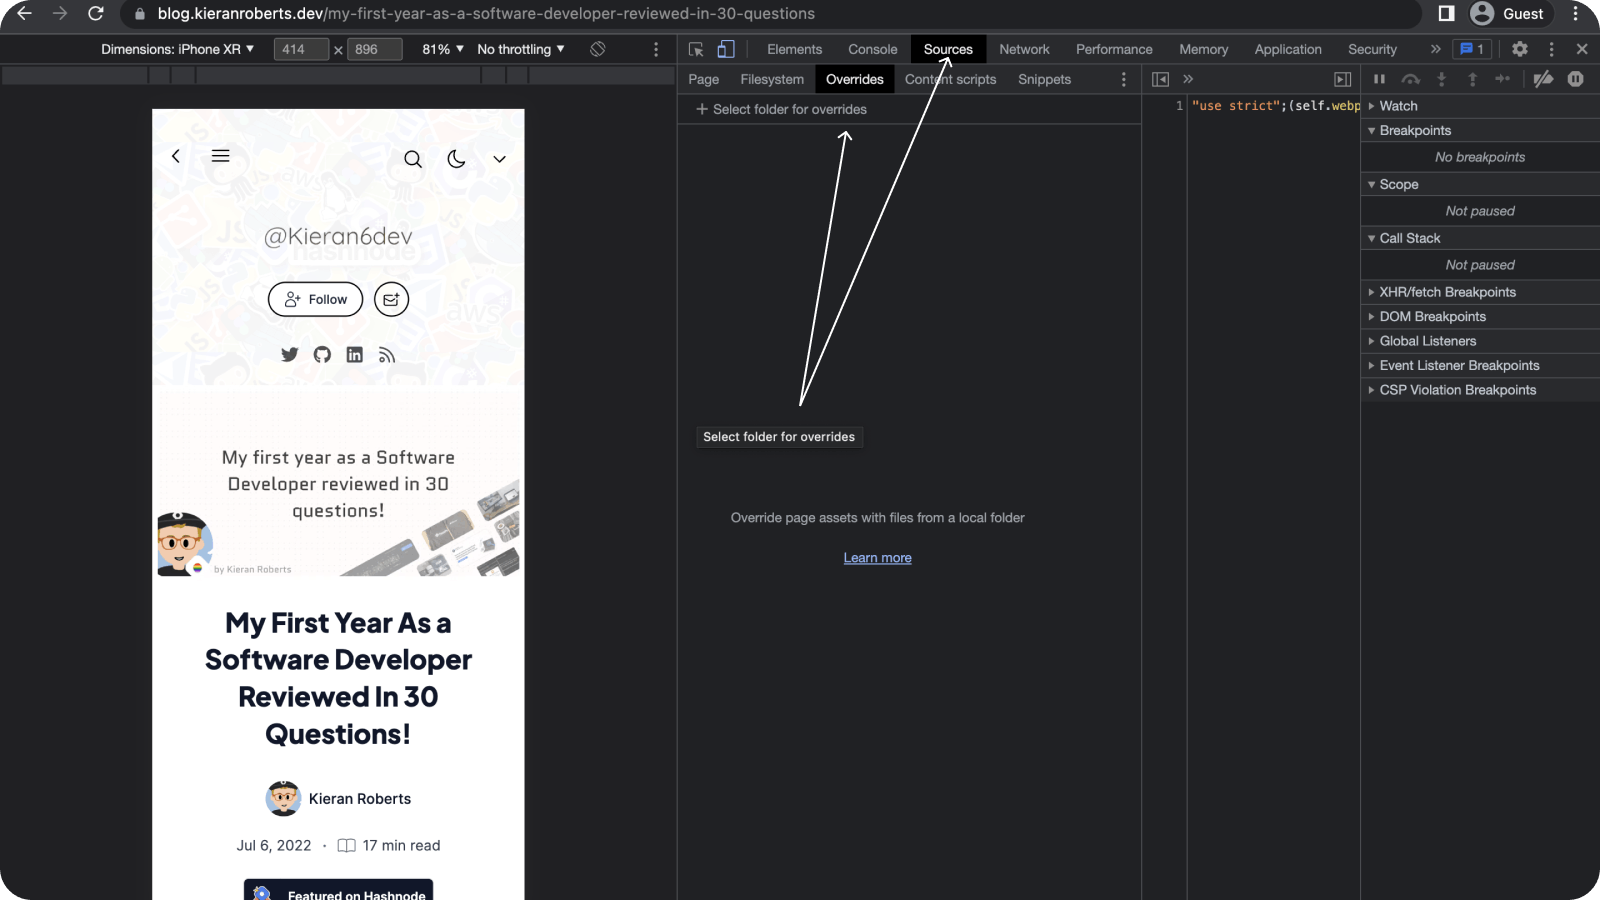
Navigate first to Sources, then the Overrides sub-tab.
Here we can select a directory on our filesystem that will save style changes we make on whatever domain you need.
Then click on Select folder for overrides. Feel free to create a new directory for your changes. You can see all this below.
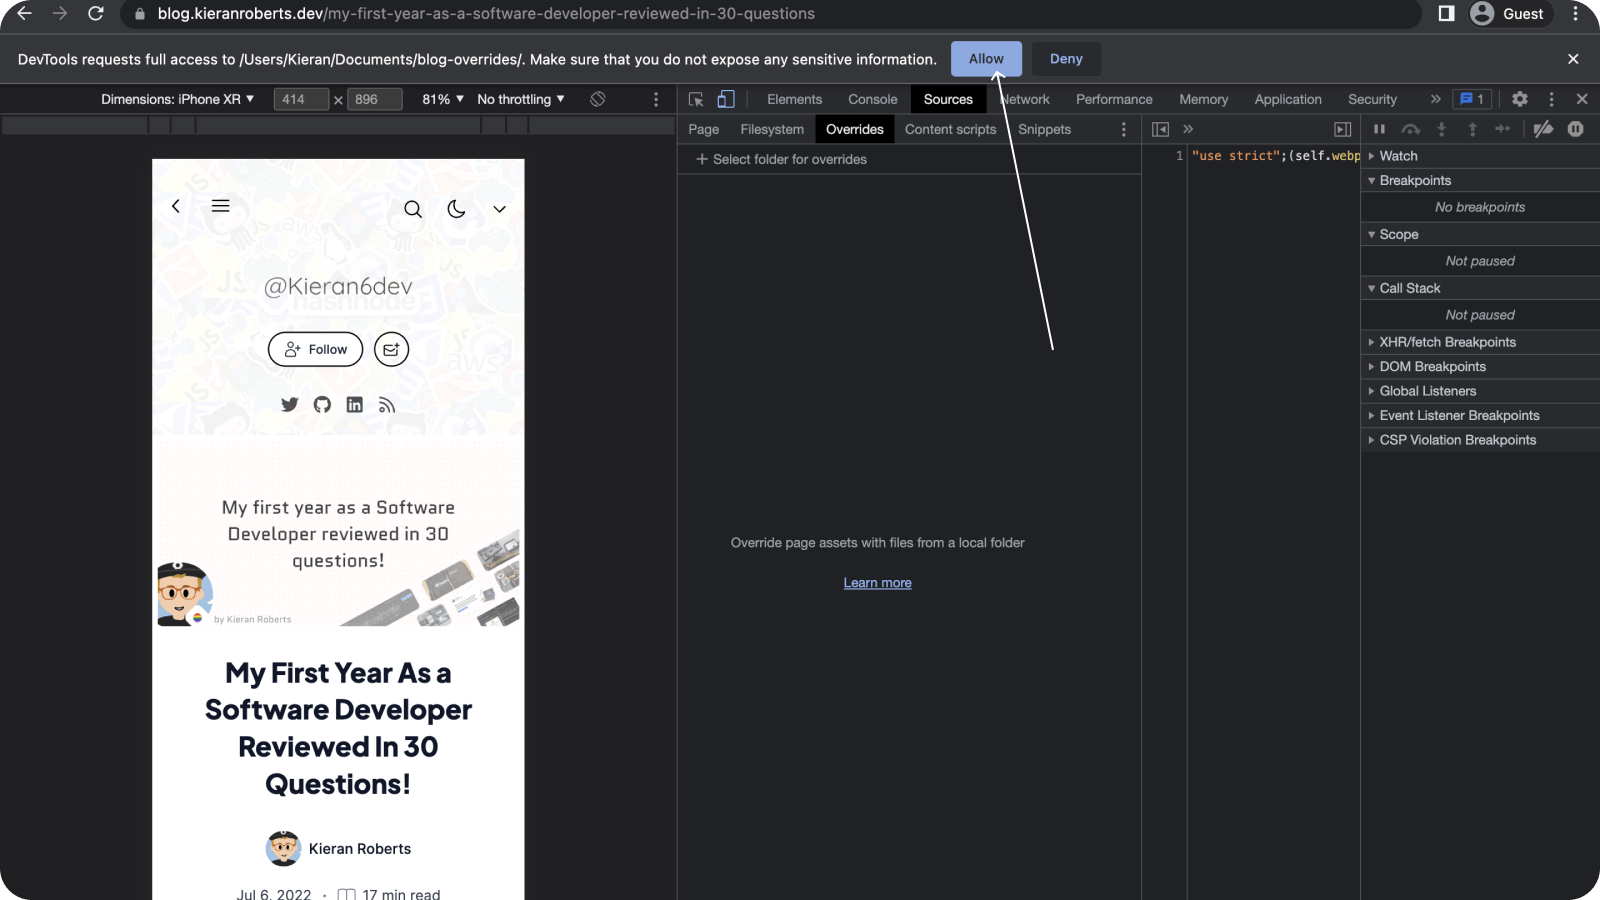
- After selecting a file you'll see a warning. Click on Allow and don't expose sensitive information as it warns.
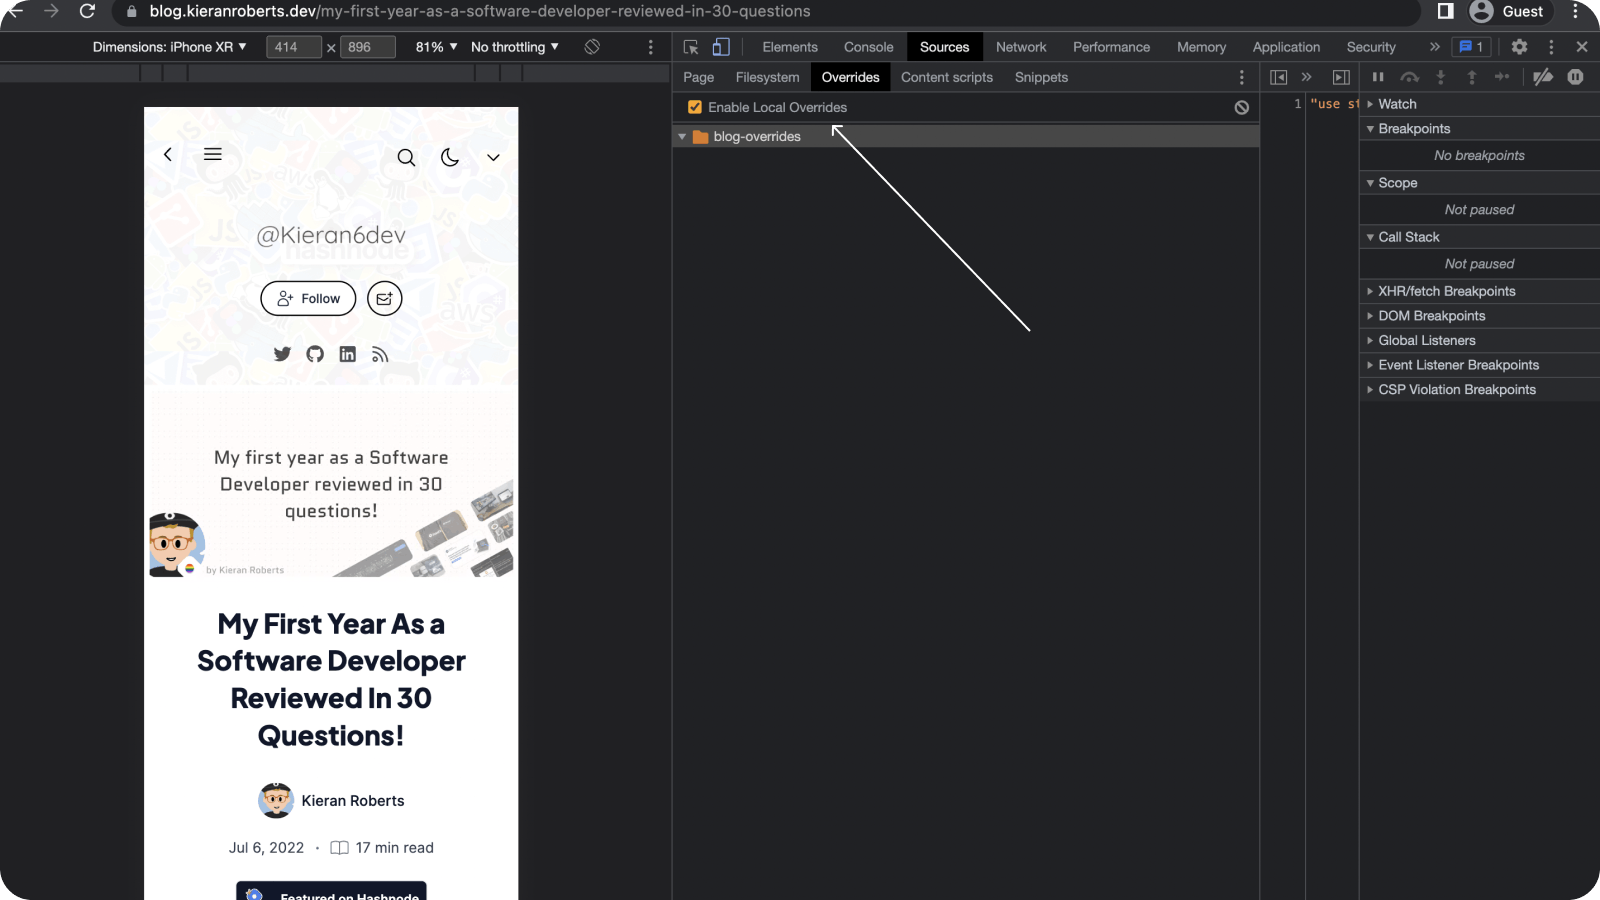
- After clicking you'll see the directory under the Overrides sub-tab. Ensure the checkbox named Enable Local Overrides is selected.
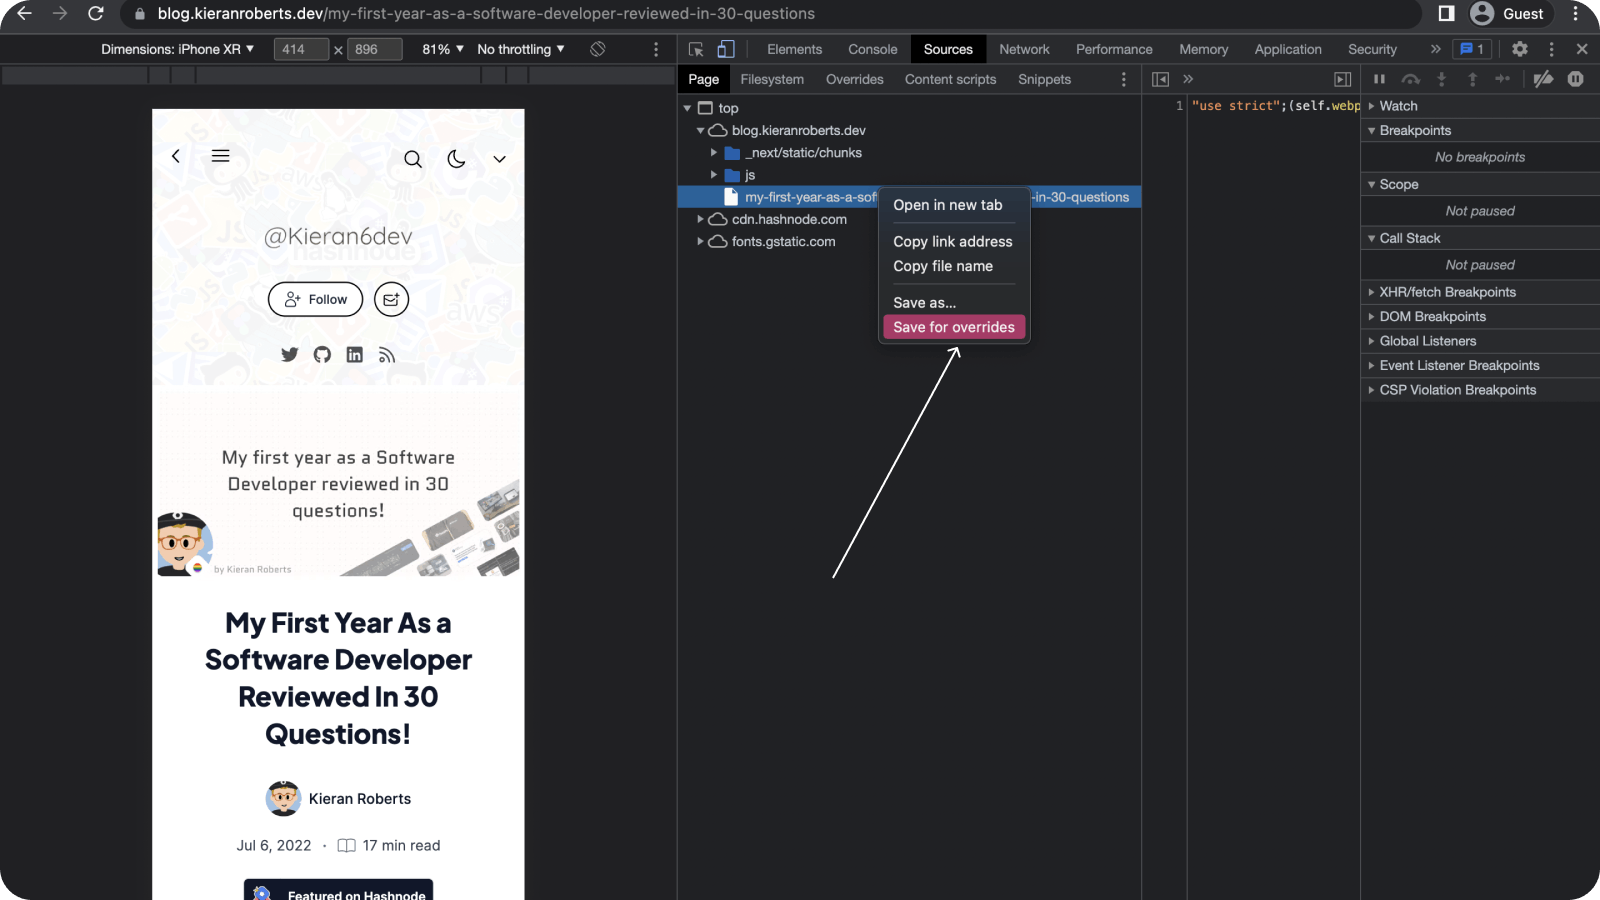
- Next up you need to select the sources you'd like to save for overrides. Navigate to the Page sub-tab. Right-click on the source where you'd like to make changes and click Save for overrides.
Now you're finally ready to make some styling changes.
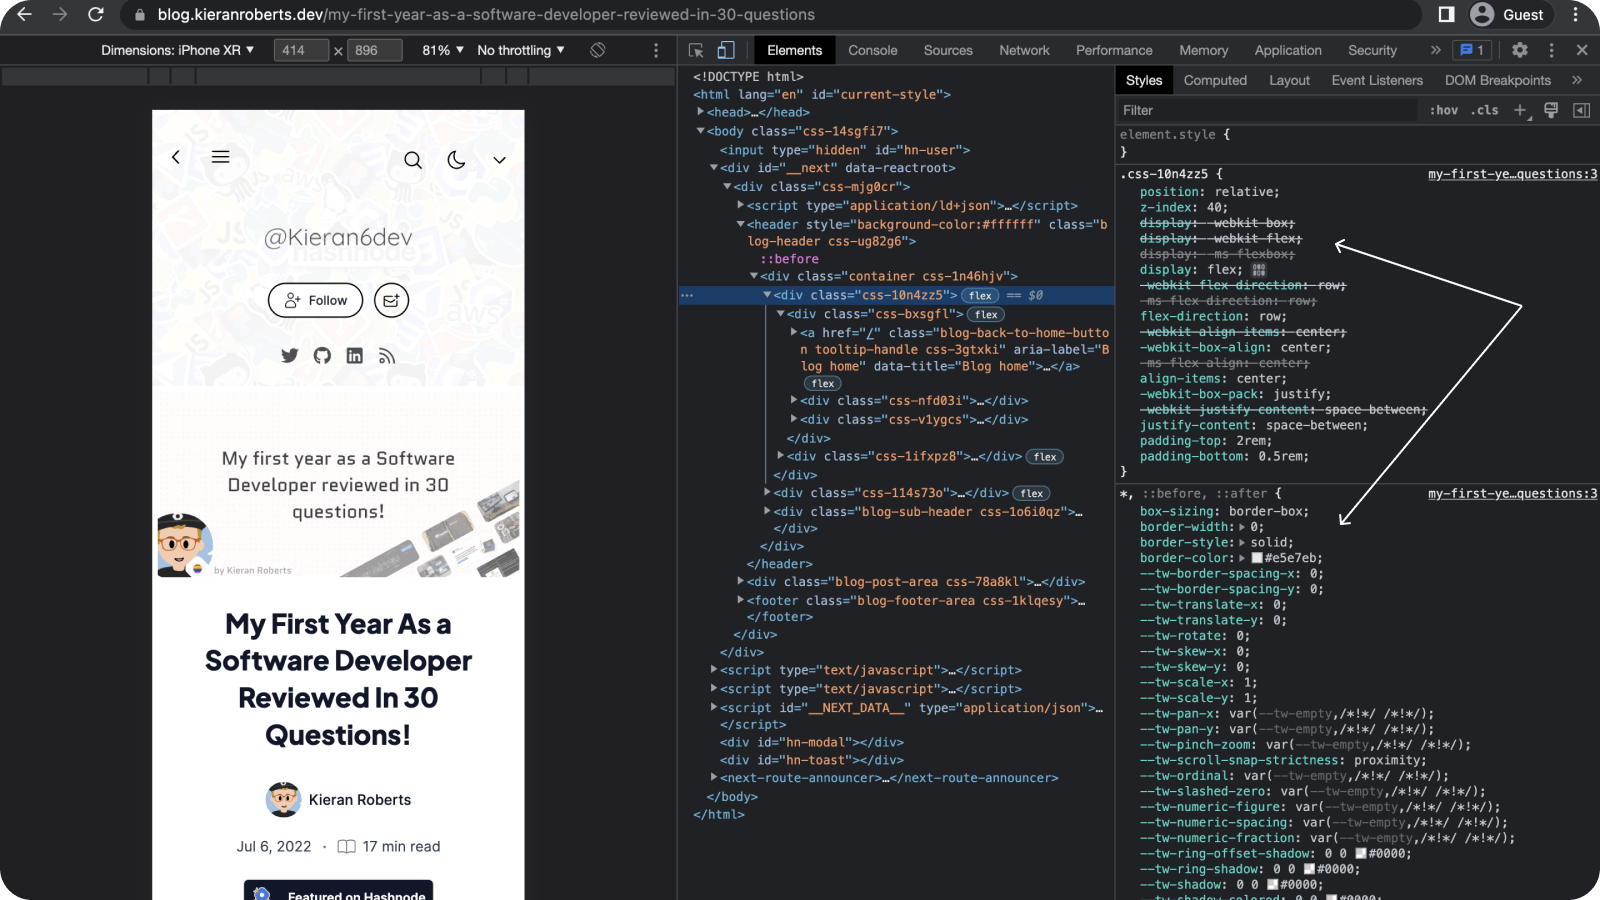
The way you make these changes has some conditions If you make style changes in the Elements tab using the DOM (Document Object Model) tree, changes will not be saved and you should use the Sources tab instead. Find your file there and make edits.
Secondly, when editing CSS in the Styles pane, if the source of the CSS is an HTML file then any changes made won't be saved by DevTools. It's better to edit the HTML file in the Sources panel to ensure any changes are saved.
Here's a quick video of style changes persisting through reload:
When an override is in effect you'll notice a little purple circle on top of the file icon and filename.
What else can you use this for?
We can use local overrides for things other than style changes as well. Some of the use cases that come to mind are:
Testing potential performance improvements
Using different fonts
Changing script load orders
Trying out changes or debugging potential issues in external libraries
It's likely not something you'll need to use very often but will come in very handy in some of these specific use cases.
Note: It's a good idea to remove your overrides after you are done.
Conclusion
Using this method I was able to run through some minor style changes very quickly and find/fix the culprit. It ended up being a highly time-efficient solution to a potentially frustrating problem.
It allowed me to cut the effort in debugging -> shipping by a considerable amount. I hope you find it useful in the future too.
See you next time 👋